FreeMIT LicenseNewFeatured

Floodlit — 3D Sneaker & Shoe Showroom for React with a WebGL Product Gallery

A 3D night showroom for sneaker and shoe stores in React and raw WebGL2: pairs stand on lit acrylic shelves, the camera walks up to the shoe you click, and sizes, add to bag and the bag live in the room. No three.js.

by UpFork, built by Ramin ValadanComponentUpdated 5 Nov 2026

2 articles about itDesign, Behind the build38 lessons
Watch0
Preview of Floodlit — 3D Sneaker & Shoe Showroom for React with a WebGL Product Gallery

Code

18 files · 44 assets

"use client";

import { forwardRef } from "react";
import { contrastInk } from "./lighting";

export type PillState = "needs-size" | "ready" | "adding" | "added" | "error" | "another";

export type AddToBagPillProps = {
  state: PillState;
  labels: Record<PillState, string>;
  /** The shoe's colour, and the text colour that passes contrast on it. */
  color: string;
  ink: string;
  onClick: () => void;
};

/**
 * One fixed size, whatever it says. Nothing around it moves. Its sweep is a transform only, its text swaps inside a
 * fixed-height mask, and its outline is an SVG stroke rather than a masked ring.
 */
export const AddToBagPill = forwardRef<HTMLButtonElement, AddToBagPillProps>(function AddToBagPill({ state, labels, color, ink, onClick }, ref) {
  const busy = state === "adding";
  return (
    <button
      ref={ref}
      type="button"
      className="fl-pill"
      data-state={state}
      aria-busy={busy || undefined}
      style={{ "--fl-pill-fill": color, "--fl-pill-ink": ink, "--fl-pill-base": contrastInk(ink) } as React.CSSProperties}
      onClick={() => {
        if (!busy) onClick();
      }}
    >
      {/* No viewBox: a stretched one turns round ends into points on a wide pill. */}
      <svg className="fl-pill-line" aria-hidden="true">
        <rect width="100%" height="100%" rx="27.25" ry="27.25" />
      </svg>
      <span className="fl-pill-sweep" aria-hidden="true" />
      <span className="fl-pill-text">
        {/* Every label is present; only the one in use is visible, so the button never changes size. */}
        {(Object.keys(labels) as PillState[]).map((key) => (
          <span key={key} className="fl-pill-label" data-show={key === state || undefined} aria-hidden={key !== state}>
            {labels[key]}
          </span>
        ))}
      </span>
      <span className="fl-pill-icon" aria-hidden="true">
        <svg viewBox="0 0 24 24" width="20" height="20" fill="none">
          <path className="fl-pill-plus" d="M12 5v14M5 12h14" />
          <path className="fl-pill-check" d="M5 12.5l4.5 4.5L19 7.5" pathLength="1" />
        </svg>
      </span>
    </button>
  );
});
18 files44 assets

From the workbench

Written about Floodlit — 3D Sneaker & Shoe Showroom for React with a WebGL Product Gallery

By the developer who built it: how it works, with its real code and live preview in the text, and the lessons learned along the way.

About

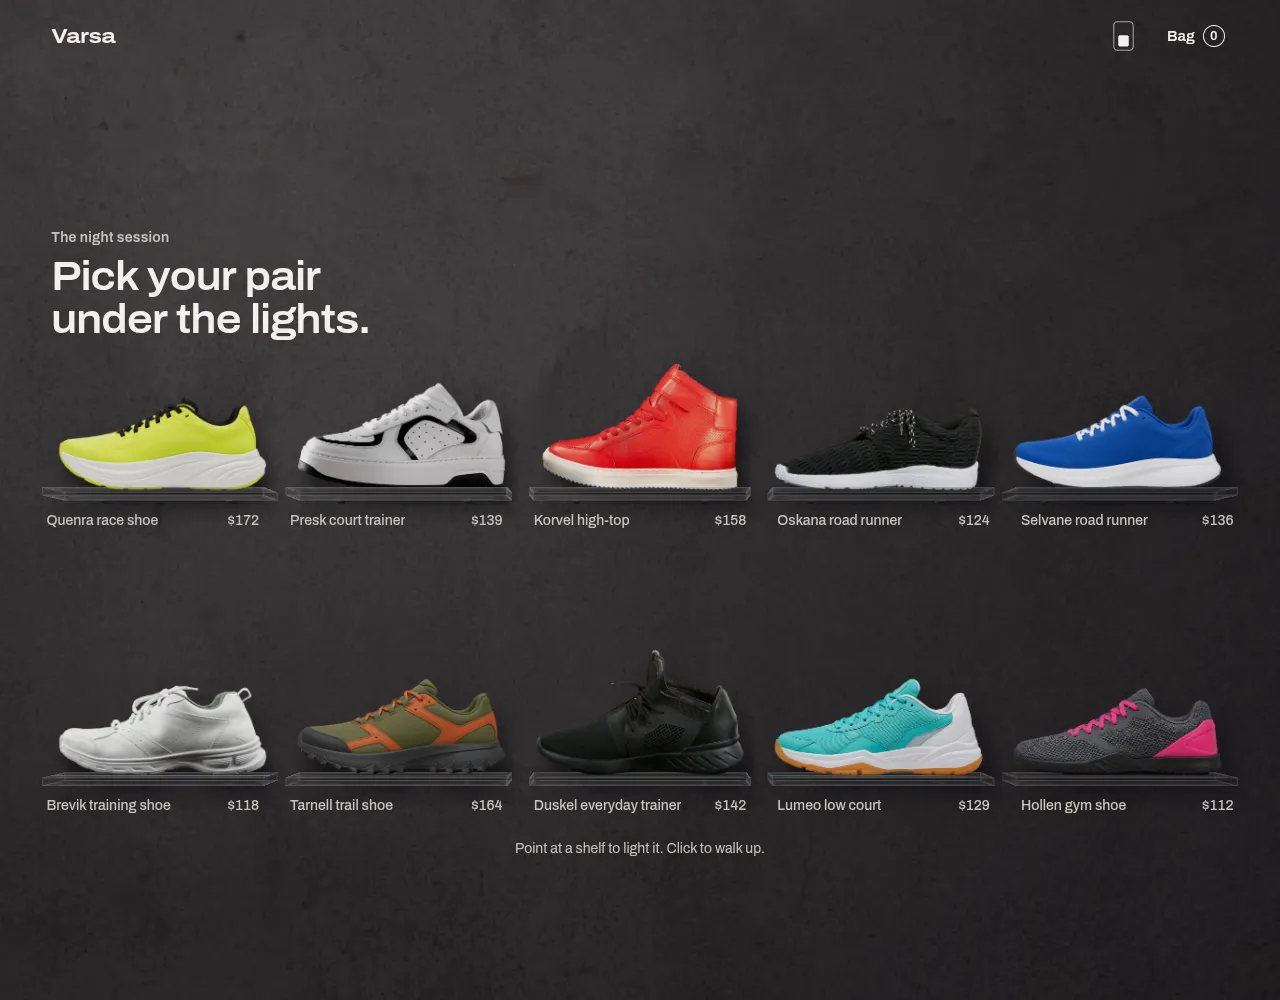
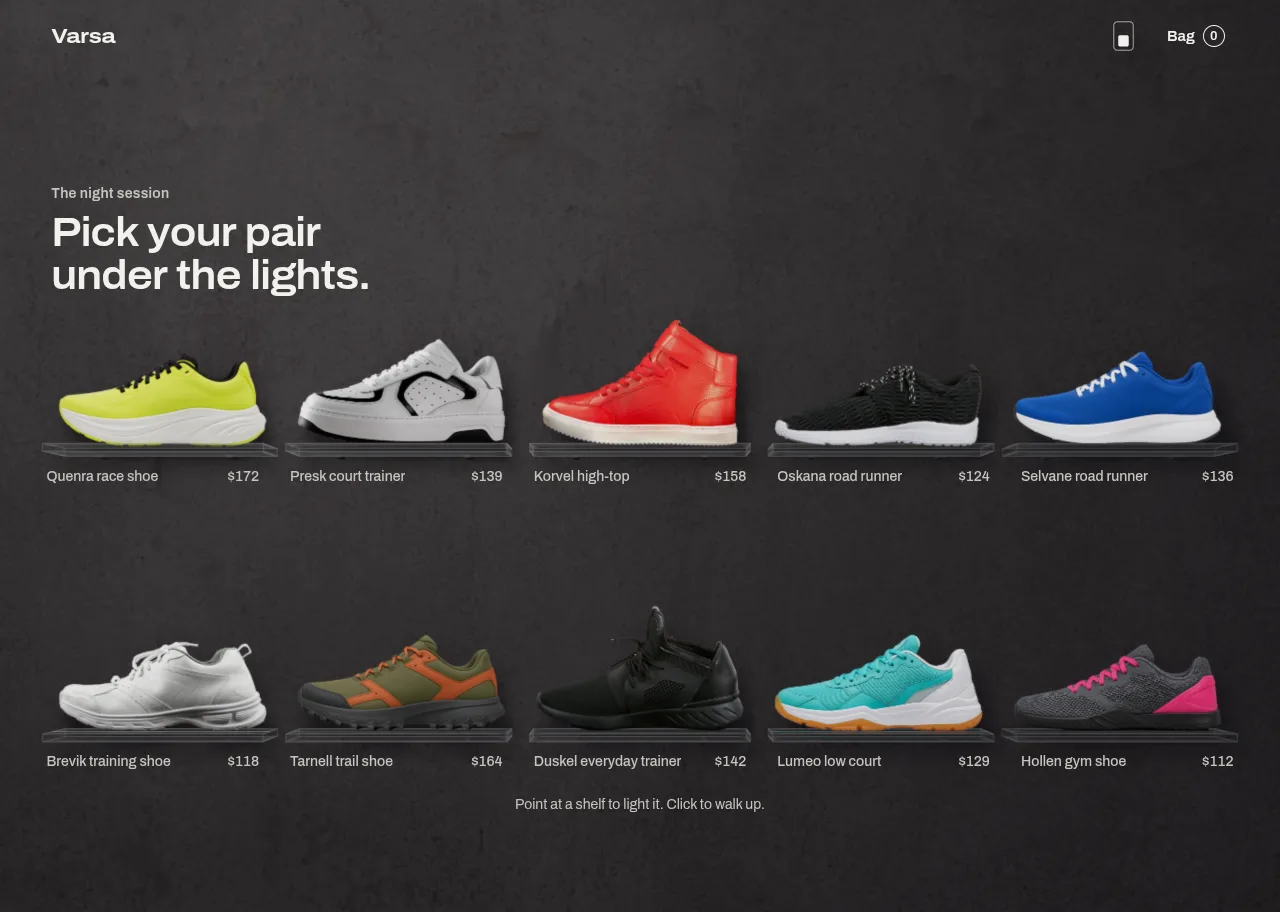
Floodlit is a night showroom for a small range of sports shoes, written in raw WebGL2 with no 3D library. Pairs stand on clear acrylic shelves against a plaster wall. Point at a shelf and a strip of light inside the acrylic comes up in that shoe's own colour, lighting its sole, the edge of the slab and the wall behind it. Click, and one camera walks up to the shoe: the wall, the slab and the shoe move against each other, as they would if you walked up to them. Then you choose a size and add the pair to the bag, in a panel that belongs to the room.

It is built for 6 to 12 pairs: a launch, a capsule, a small brand's whole range. It is not a catalogue.

What it does

  • One room, one camera. Every shelf is seen from the same eye, so the top row is seen from below and the bottom row from above. The light is worked out in the shader in linear light, with no blurred boxes and no painted glow.
  • A walk, not a zoom. About 1.1 seconds, with weight, and the panel only enters once the camera has cleared its path. Walk along to the next pair with the arrows, the keys, a swipe or a click on the neighbour. Any command mid-walk carries on from where the camera is.
  • A closer look. A torch follows the pointer across the wall, the camera looks around a little, and views and a zoom take you in as far as each picture allows.
  • Buying that fits the room. Size tiles with sold-out and low-stock sizes shown, a remembered size, and an add-to-bag pill with five states, including a failed add that keeps your size. A glass bag: the world dims and softens behind it in the shader.
  • Real links underneath. The wall is a list of real links, in the server's markup, placed by CSS alone. Crawlers, middle-click, keyboards and screen readers all work without WebGL. The canvas fades in over the first paint within 1 px of the same place.
  • Draws only when something changes. At rest it draws nothing at all. The room runs in a Web Worker where the browser allows, and falls back to the page's own thread where it does not.
  • Everywhere. Phones scroll the page and the camera follows it down the wall; in focus, the shoe sits above and the panel is a sheet below. Light, dark and auto themes. Right to left. Reduced motion. No WebGL or a lost context keeps the whole buying path, and with no JavaScript the wall and its links still work.

Measured

Text is measured against the lit pixels actually behind it, in 67 states and both themes: all at least 4.5:1. axe reports no violations. Checked at ten widths from 320 px to 3440 px, on one laptop with an Intel Iris Plus in Chrome. Frame times were not measured on a quiet machine, so no frame rate is claimed. Not tested on a real phone, Safari or Firefox.

Your pictures

The room needs a transparent side view of each shoe, about 2000 px wide. The photo pipeline that made the demo's set is included. A fromShopifyProducts mapper is included too, but a shop's own product photos are usually not transparent side views, and the room will not look right until they are.

The code is MIT. The demo's pictures are not: 5 of the 10 shoes are real photographs under their own licences, and 5 are AI-generated images made with Grok and ChatGPT. We have not verified those tools' terms for this use, so check them yourself, or replace the pictures. The store, the models and the prices are invented.
Reviews and bugs

0 reviews · 0 bugs

Ship it0With fixes0Skip0· 0 reviews

0 bugs0 open0 fixed

Members who have it review it and report its bugs. Sign in

No reviews or bugs yet.

Manual installation

Without the CLI

  1. 01

    Copy the files into your project

    • components/floodlit/add-to-bag-pill.tsx
    • components/floodlit/bag-drawer.tsx
    • components/floodlit/camera.ts
    • components/floodlit/client.ts
    • components/floodlit/engine.ts
    • components/floodlit/floodlit.css
    • components/floodlit/floodlit.tsx
    • components/floodlit/gl/shaders.ts
    • components/floodlit/host.ts
    • components/floodlit/index.ts
    • components/floodlit/layout.ts
    • components/floodlit/lighting.ts
    • components/floodlit/room.ts
    • components/floodlit/room.worker.ts
    • components/floodlit/shopify.ts
    • components/floodlit/size-tiles.tsx
    • components/floodlit/spring.ts
    • components/floodlit/types.ts

    The paths follow the shadcn/ui layout, with @/ as your project’s import alias.

  2. 02

    Its pictures load from UpFork

    The code above points at UpFork’s copies (2.9 MB), so there’s nothing to copy. To host them yourself, use Download source: its ZIP has the files where the code expects them, and a README on the switch.

Before you buy

Everything you need to know

How this component gets from the preview into your project, and what buyers ask most.

How to use it

From the preview to your project

  1. 01

    Try it in the preview

    Switch between light and dark, and resize it to phone and tablet widths, before you decide.

  2. 02

    Get it

    Free products are yours with a free account. Paid ones settle in USDT on TRON, sent straight to the wallet on your order.

  3. 03

    Install it

    Components go into your project with one shadcn command, dependencies included. Everything else downloads with a checksum.

  4. 04

    Make it yours

    It's your code now: rename it, restyle it and wire in your real data.

  5. 05

    Or hand it to your AI

    Copy the prompt and let your coding assistant place it in your project, following your conventions.

Building with an AI assistant?

Copy a ready-made prompt with the code, its dependencies and a demo, and your assistant can put it in place for you.

Copy AI prompt

Selling your own work?

Get approved once, then publish components, templates and mobile components, paid in USDT straight to your own wallet.